- Melanie Lynette
- Jan 28
- 11 min read
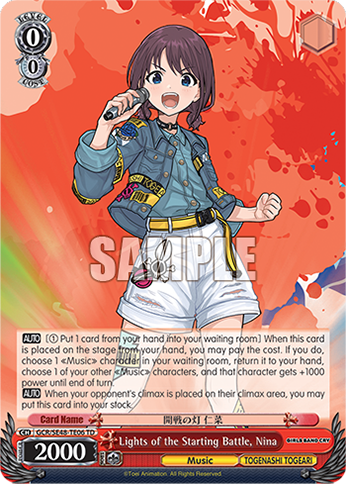
Girls Band Cry is a very powerful Premium Booster and TD+ release that has an amazingly deep combination of experimental and powerful card effects. If sticking to non-foil cards, the entire set becomes very affordable, even to upgrade. (As of the writing of this article in January 2026, there is only one card in the Japanese main set and TD+ over 1000 yen, and it’s the 0/0 Nina due to her widespread use in decks.) While the English version of the set may have a slightly different price point due to print run size, I still feel like this set will be very easy for players to upgrade outside of some PRs that we’re not sure how they’ll be released yet exactly as of the timing of this article.
Let’s continue the series with a look at a deck that features Rupa and Tomo! Their Level 0 and 3 combos that share a climax combo often get overshadowed by the powerhouse that is Momoka and Nina, but are actually very playable.
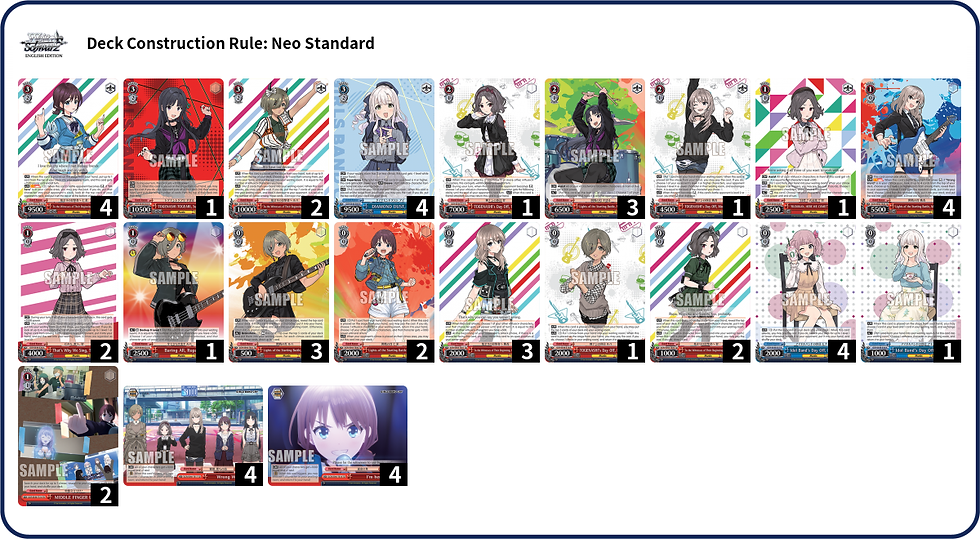
Deck 1 Code: 48RZ9

Quick Pilot Guide Deck 1:
Note: There is one card in this list that, at least in English, may push the definition of a budget deck. The 3/2 Early Play Rupa is essential for this list as she’s the only target for the Level 3 Tomo combo. As of the time of writing this article around the time of English release in January 2026, the non-foil Rupa 3/2 is only a 500 yen card in Japanese. Hopefully print run levels will allow her non-foil in English to be around that comparable price point and be accessible. If not, it’s definitely a must have for the Level 3 game of this deck list to work!
This fun budget list celebrates Rupa and Tomo’s partnership prior to Togenashi Togeari’s creation, so an attempt has been made to keep as close to the theme as possible by sticking with Rupa and Tomo’s cards. Downside? They only share one climax combo! So I decided to fill in with the Level 1 Momoka’s TD+ combo since both of them are at least featured on the climax art. If you find this Level 1 combo not working, feel free to swap it for some other Level 1 or 2 combo that better fits your needs.
From Level 0, if it makes sense, you can start using the 0/0 Rupa (15) climax combo to start building extra stock and possibly triggering extra Comeback (Door) triggers to replenish your hand. You can also use some of the other utility in the deck to set up for the Level 1 Momoka combo (the 0/0 Rupa (15) gives her a nice extra power boost with her rest ability for the on reverse effect). While you do have an early play healer in the 3/2 Rupa, play her sparingly at Level 2 so to preserve resources and have her for the Level 3 Tomo combo. At Level 3, depending on the amount of resources that have been built up, the idea is to light at least two of the Level 3 Tomo so that she and Rupa combined get 5 attacks. You may be able to carefully manage resources to get off 3, especially since the Level 3 also combos with the 0/0 that returns to hand to give trigger check twice to someone alongside the fact that Tomo draws up to 1 card on play to replenish herself in hand. I’ve included a one copy of the TD+ Rupa in the list in case you feel like you need some extra mill, dig for a climax, and possibly a chance at a different type of finisher. Also, be very careful about attack order and take advantage of side attacks if you suspect that your opponent has rest counters. Tomo’s swap into Rupa happens at the end of attack, so if something prevents the attack from happening that can make it hard to push enough damage to close out the game.
Deck 2 Code: 5MB0P

Quick Pilot Guide Deck 2:
This deck is going to run very similar to Version 1, but it notably swaps the 1/0 Tomo and Rupa for the pair of 1/0’s that can bond one another. This helps to relieve hand issues somewhat, as the Level 0 utility for this deck doesn’t really plus to hand outside of brainstormers (it’s more filter than anything). Rupa can pay a stock to bond a Tomo, who can pitch to bond a Rupa. Ideally, you have a copy of each in hand so you can get their power buffs and on attack abilities. If you find yourself in game scenarios where an on reverse combo isn’t happening, or it’s only happening in one lane, this combo can help keep the game going with some decent power levels. Level 3 plays the same. Be sure to try to preserve hand resources throughout so you can at least get two of the Tomo/Rupa change off!
Deck Code 3: 5QG11

Quick Pilot Guide Deck 3:
This version of the deck takes a page from one of the competitive variants of the deck, but uses the 2/1 Nina combo instead of the TD+ Momoka combo. You can only use one of the 2/1 Nina’s ability per turn, since she has to send the climax in the climax zone to waiting room as part of her cost, but the 1/0 Rupa/Tomo bond partners actually make it slightly easier to get the 4 of band members on board to early play Nina. With NIna sitting at 8000 power, if you can protect her with a 1/0 Rupa counter that hits 2500 power with a full board to last an extra turn to redo her climax combo you should have plenty of stock to help keep hand up (even if you can’t, you’re up one from the cost of the Nina). Just be careful with your hand so you can set up the Level 3 game!
Note: There is a variant of this deck that can also run an empty Comeback (Door) climax trigger and just focus on the Tomo/Rupa 1/0 bond pair to maintain board state, with the climax combo of choice being the 0/0 Rupa combo early game to recoup extra stock with the trigger step twice and power up characters. This does free up some deck slots to increase the Level 0 counts and to increase copies of some decent Level 2 utility cards for consistency purposes. Feel free to experiment with this if you find the other deck variants with Level 1 combos hindering your game play.
Budget Swap-Ins for both decks:
Because I kept the deck Rupa x Tomo themed, here are some budget swap ins of their cards and the other girls to help increase deck consistency!


Upgrades for when there’s some extra change in the wallet after payday:
This series may be very affordable for some players to upgrade due to its premium booster format so long as you aren’t chasing foil versions of cards. You will likely be able to find even popular cards at a lower price nearer to the release period due to this. Here are some of the pricier upgrades you may consider incorporating when it makes financial sense. On top of that, because the Blue cards and Diamond Dust is a very small section of the main set with no PR support, all of the cards you need to build with are in the budget category for the most part. It’s only when you lean into the Red card color splash for better consistency and utility that you need to start saving.
Note: I’m also avoiding any PR cards in his section for now, even though there are some very powerful ones that have seen a lot of play in Japanese competitive lists (The "Avoid Note" PRs, for example). As of the publication date of this article around release week in January of 2026 we don’t know when or how they’ll be released. Depending on how the PRs are released for this set, they could be easy or difficult to obtain for players.


I actually don’t expect this 1/0 Momoka combo to be very expensive since, while it’s a very solid on attack handfilter/plus combo, it doesn’t help the deck necessarily recoup all of the stock resources you need to accomplish multiple Nina 3/2 finishers. It also doesn’t mill through the first deck, so it can result in some difficult game state situations from time to time. Still, this may be a better fit upgrade 2nd comb for this deck over the TD+ Momoka or the 2/1 Nina. Definitely worth considering if you’d like to try it out in a build.
Be sure to check out this and other Budget Remix Series possibilities at: https://level4weissschwarz.wixsite.com/lvl4ws


